This is the sixth part of an ongoing series about building a low cost, open source streaming internet radio. If you haven’t already, check out the previous parts (see the links at the end of this article) for some background about the project.
Let’s review…
It’s been a few weeks since I posted part five, so let’s quickly review where we are with this project:
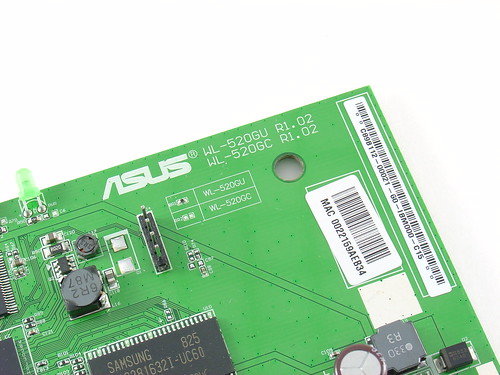
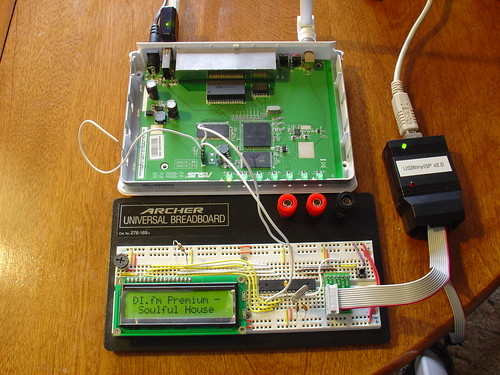
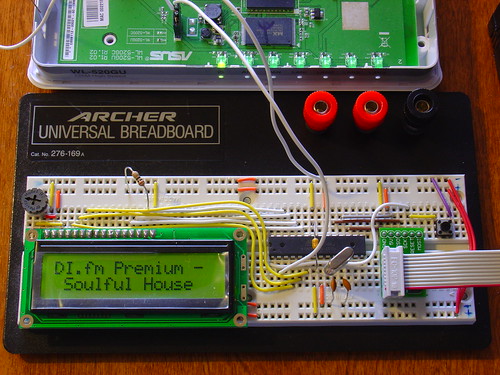
At this point we have a hacked ASUS WL-520gU wireless router running OpenWrt (Linux). A cheap USB-audio adapter is connected to the router’s single USB port, and in part four we installed kernel drivers for Linux USB and audio support. In part three we added a connection to the router’s internal serial port via a 4-pin header. Wireless networking worked pretty much out of the box, and in part five we used opkg, OpenWrt’s package manager, to install mpd, the Linux music player daemon, and mpc, a command-line-based mpd client.
This gives us a compact networked device that can wirelessly connect to streaming radio stations and play 16-bit 44kHz stereo audio on a pair of headphones or amplified external speakers. Pretty impressive, given that this device started as an inexpensive wireless router!
What’s missing?
Something big is missing from the radio. The original concept for this radio was that it would be a standalone device. Shell access is cool, and iPhone control is even better, but ideally we’d like to be able to see what song and station are currently playing as well as change stations without the use of another computer or mobile client.
What we need is a user interface!
Based on our requirements, the user interface needs to do two things:
- Display information about what’s playing from mpd
- Gather input from the user and tell mpd when to change stations.
A volume control will be part of our finished user interface as well, but it will be simple enough to do this in hardware when we put the radio into an enclosure. In this part, we’ll start work on the first requirement – the display.
Note: The following steps assume you are accessing the OpenWrt shell through a telnet or ssh connection, not using the FTDI USB-serial cable. The reasons for this will become obvious later, when we start using the router’s serial port for other purposes!
First of all, how do we get information about what’s currently playing on our radio?
Chatting with mpd:
The command-line program mpc that we installed in part five will return information about the current song if we execute it without any options:
root@OpenWrt:~# mpc
SLAY Radio: Jogeir Liljedahl - Terra Cresta
[playing] #1/5  22:36/0:00 (100%)
volume: 60%   repeat: on    random: off
Mpc obtains playlist, volume, and settings information by sending queries to the mpd server running on the router. The mpd site includes an overview of the communications protocol and command set. By default, mpd listens for commands on port 6600. You can access this port remotely by using one of many client programs, or locally by opening a telnet connection to port 6600 locally (the commands are in bold for clarity):
root@OpenWrt:~# telnet localhost:6600
OK MPD 0.13.0
status
volume: 60
repeat: 1
random: 0
playlist: 14
playlistlength: 5x
fade: 0
state: play
song: 4
songid: 4
time: 2348:0
bitrate: 192
audio: 44100:16:2
OK
currentsong
file: http://relay3.slayradio.org:8000/
Name: SLAY Radio
Title: Jogeir Liljedahl - Terra Cresta
Pos: 0
Id: 0
OK
The connection will timeout in about a minute if left idle.
As you can see, there is a lot of information available, including some of the same information mpc gave us earlier. The advantage of directly accessing mpd is that we get the stream name (the Name: line) and the artist/title (the Title: line) broken down separately instead of on one continuous line, with handy labels that will make it easy for us to parse the data later.
We can also access mpd by using the nc command, short for “network cat”. Using nc allows us to easily pipe data from other commands to mpd and examine the results.
root@OpenWrt:~# echo "currentsong" | nc localhost 6600
file: http://relay3.slayradio.org:8000/
Name: SLAY Radio
Title: Jogeir Liljedahl - Terra Cresta
Pos: 0
Id: 0
OK
(As an aside, OpenWrt uses a program called busybox to emulate a UNIX-style shell environment – several common shell commands are included. There is considerable documentation here, but not all commands listed are actually included in the default OpenWrt busybox installation.)
If we just want the name and title of the current song, we can use the UNIX command grep to strip out just those two lines:
root@OpenWrt:~# echo "currentsong" | nc localhost 6600 | grep -e "^Title: " -e "^Name: "

Name: SLAY Radio
Title: Jogeir Liljedahl - Terra Cresta
Talking to external devices:
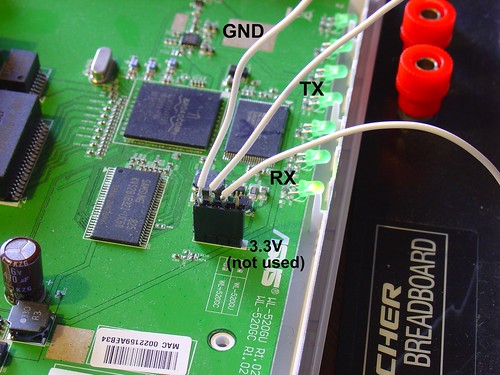
Now that we have a way to get song information from mpd, we need a way to direct this information to an external display. The router comes with a handy mechanism for doing this – the builtin serial port. Linux makes it easy to direct the output of grep to the router’s serial port, just add a redirect to /dev/tts/0 at the end of the command (all on one line, wrapped here to fit the page):
root@OpenWrt:~# echo "currentsong" | nc localhost 6600 | grep -e "^Title: "
-e "^Name: " > /dev/tts/0
root@OpenWrt:~#
However, it turns out that the serial port’s default speed of 115200 baud is too fast for some external displays. If we want to be able to talk to an AVR microcontroller, for example, we need to change the speed of the serial port from it’s default value of 115200 to 9600 baud. This can be done easily with the stty command.
Note: If you downloaded and installed OpenWrt prior to December 3rd by using the files on this site, stty is most likely missing from your installation. Unfortunately, the only way I know of to easily fix this is to completely reinstall OpenWrt, since stty is part of busybox and included in the base firmware image. You can check if you have it by executing ‘stty’ from the command line of the router – if you get an error, you will need to reinstall.
You can change the baud rate of the serial port by executing:
root@OpenWrt:~# stty 9600 < /dev/tts/0
Connect your FTDI USB-serial cable to the router’s serial port and open a terminal program set to 9600 baud, 8N1. Execute the last mpd query again, you should see the name and title appear in your terminal window:
root@OpenWrt:~# echo "currentsong" | nc localhost 6600 | grep -e "^Title: "
-e "^Name: " > /dev/tts/0
In the terminal window:
Name: SLAY Radio
Title: Jogeir Liljedahl - Terra Cresta
Now we have a way to get information about the current song and direct it to the serial port.
We can do this is an automated way by using a shell script:
#! /bin/sh -
# display.sh - Wifi Radio LCD display routines
# 12/12/08    Jeff Keyzer    http://mightyohm.com
# This shell script queries mpd for current song information and sends
# relevant bits of it to the serial port, where an AVR-based LCD display
# is waiting.
#
# For more information, visit
# https://mightyohm.com/blog/
#
trap 'exit 1' SIGINT    # exit on ctrl-c, useful for debugging
stty 9600 < /dev/tts/0  # set serial port to 9600 baud
                        # so we can talk to the AVR
while true        # loop forever
do
 echo "currentsong" | nc localhost 6600 | grep -e "^Title: " -e "^Name: " > /dev/tts/0
 sleep 1
done
You can either copy and paste this script to a file on the router, or download it with wget:
root@OpenWrt:~# cd ~
root@OpenWrt:~# wget http://mightyohm.com/files/wifiradio/display.sh
Connecting to mightyohm.com (72.32.209.132:80)
display.sh           100% |*******************************|   668  --:--:-- ETA
Be sure to make the script executable by using chmod:
root@OpenWrt:~# chmod ugo+x display.sh
If you run the script you should see the name and title information update in the serial terminal once a second.
root@OpenWrt:~# ./display.sh
The script will loop forever – hit control-c in the router’s shell to exit.
That’s it for part six! In part seven, we’ll add an AVR-based serial LCD display to the router – stay tuned!
Update: Part seven is now available.
Update 2: There is a new Wifi Radio Discussion Forum, hop over there to ask questions about the project or see what other people are working on! (4/12/09)