I wanted to build a tuning device so I could listen to radio without using any pc, monitor or keyboard.
- - Tuning as well as setting the volume should be done the old fashioned way by turning a knob.
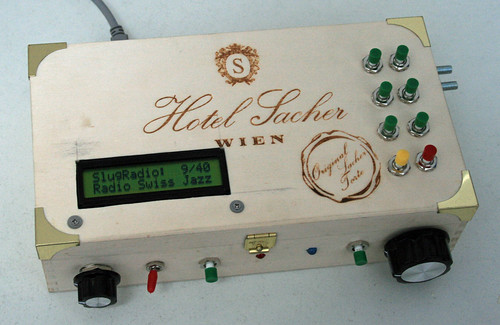
- Seeing the station name on a display would be nice, but not a must
- Device should have a built in amp with a speaker (sound quality not important at the beginning)
http://www.flickr.com/photos/rigasw/set ... 708689711/
OS installation
===============
I installed SlugOS 5.3 beta on a 4 GB stick (excellent description on how to do that in unslung.org: http://www.nslu2-linux.org/wiki/SlugOS/ ... ugOSSystem)
Installed a Delock USB 7.1 sound adapter (12,- Euros); this soundcard on a stick has only enough power for headphones; so later in the project I built an amp based on IC LM386
Made soundcard work: http://www.nslu2-linux.org/wiki/HowTo/SlugAsAudioPlayer
Installed MPD and MPC (mpc is from an "optware feed". See last step of the os install docu above)
Configured xinetd service "podcast-bounce", so I can add stations in the "m3u" or "pls" syntax. Excellent solution!
(http://mpd.wikia.com/wiki/Hack:podcast-bounce)
Filling the playlist
====================
The following web site lists a lot of international radio stations that broadcast over the web.
So I searched for my favourite stations that provide m3u or pls URLs.
http://www.listenlive.eu/index.html
The string "http://linksys:8082/?feed" is part of the proxy "podcast-bounce":
mpc add http://linksys:8082/?feed=http://www.dr ... ng/dlf.m3u
mpc add http://linksys:8082/?feed=http://www.dr ... kultur.m3u
mpc add http://linksys:8082/?feed=http://www.dr ... wissen.m3u
mpc add http://linksys:8082/?feed=http://stream ... ern1_1.m3u
mpc add http://linksys:8082/?feed=http://stream ... uell_1.m3u
mpc add http://linksys:8082/?feed=http://www.bb ... /eneuk.pls
mpc add http://linksys:8082/?feed=http://live-t ... eradio.m3u
mpc add http://linksys:8082/?feed=http://stream ... p3_128.m3u # DRS4 News live
mpc add http://linksys:8082/?feed=http://www.ra ... ve/mp3.m3u # Radio Swiss Jazz
mpc add http://linksys:8082/?feed=http://www.wd ... rtmund.m3u # WDR 2 Ruhrgebiet
mpc add http://linksys:8082/?feed=http://yp.sho ... id=1002362 # Old Time Radio
mpc add http://linksys:8082/?feed=http://stream ... ssik_1.m3u
mpc add http://linksys:8082/?feed=http://stream ... ern2_1.m3u
mpc add http://linksys:8082/?feed=http://stream ... ern3_1.m3u
mpc add http://linksys:8082/?feed=http://www.ei ... nslive.m3u
mpc add http://linksys:8082/?feed=http://newsta ... listen.pls # Newstalk Irland
mpc add http://linksys:8082/?feed=http://mp3str ... listen.pls # ORF info radio
mpc add http://linksys:8082/?feed=http://sc19.a ... 3_w50a.m3u # Nordwestradio
mpc add http://linksys:8082/?feed=http://s8.med ... listen.pls # Radio Luxemburg
mpc add http://linksys:8082/?feed=http://www.li ... /90elf.m3u
mpc add http://linksys:8082/?feed=http://82.201 ... 10Gold.m3u
mpc add http://linksys:8082/?feed=http://www.wn ... eam/fm.pls
mpc add http://linksys:8082/?feed=http://www.wo ... fm.mp3.m3u
That makes a playlist of 23 stations.
To listen to one, one has to enter:
mpc play nn
Connecting the hardware
=======================
To use the serial interace on the nslu2's board, one has to solder three pins in the right postion.
The description is here:
http://www.nslu2-linux.org/wiki/HowTo/AddASerialPort
My friend Matthias did that for me ...
As the slug and the arduino operate with different voltages you need a voltage divider with two resistors as used and described in Jeff's WiFi radio.
Setting up the arduino
===================
Arduino's analog pins 0 and 1 are connected to two 10K pots.
One pot is for setting the volume, the other for selecting the station.
Every second arduino sends a 4 character digit over the serial port to the slug; the first two digits represent the station, digit three and four the volume:
Code: Select all
 // map is used to convert the 1024 pot values into chunks of 1024 / numbStations

  int tunerValue = map(sensorValue, 0, 1023, 1, numbStations);

// Value 80 is more than enough
  int volValue =map(volumeValue, 0, 1023, 0, 80);


// send tuner value and volume in one line
// seperate with command "cut" in linux
// fill up with a leading zero if tunerValue or volValue < 10
// so we send always four digits to the slug

  if (tunerValue < 10) {
    Serial.print(0);
  }
    Serial.print(tunerValue);
 if (volValue < 10) {
    Serial.print(0);
  }
    Serial.println(volValue);
=================
I did a first successful test with a 2x16 lcd display; but till I have done all the wiring in a neat way, I live with a simple one led tuning indicator:
When pressing a pushbutton, a blinking led signals the number of the current station.
(Numbers from 1 to 4 are signalled with a short blink, the five is displayed with
a long blink.)
Code: Select all
/* LED as tuning indicator

Number of selected station is signaled using one led and a push-button:

Numbers from 1 to 4 are signalled with a short blink, the five is displayed with
a long blink:

example:

Long - Long - short - short - short - short signals: Station 14

For the remainder the modulo function is used.
*/

 NofFive = tunerValue / 5;
 NofRemainder = tunerValue % 5;

 buttonState = digitalRead(buttonPin);

if (buttonState == HIGH) {
 delay(400);
 int i;
 for (i=0; i < NofFive; i++) {
   digitalWrite(ledPin, HIGH);
   delay(400);
   digitalWrite(ledPin, LOW);
   delay(600);
 }

 for (i=0; i < NofRemainder; i++) {
   digitalWrite(ledPin, HIGH);
   delay(200);
   digitalWrite(ledPin, LOW);
   delay(200);
 }
}===================================
The only way that I found to activate ttyS0 on the slug was using "minicom" which is sent in the background using command "screen".
The following script loops till we get a value greater 99 via the serial port.
That would mean a value between 0100 and 2390
0100: Station 01, volume 00
2390: Station 23, volume 90
when we get a proper input, the loop ends and the script "testinterface.sh is started.
Code: Select all
#!/bin/sh
# set -x
case "$1" in
  start)

/bin/beep -r 5
inputline=99
       until [ $inputline -gt 99 ]
    do
/bin/kill -9 $(pidof SCREEN)
/bin/sleep 20
/usr/bin/screen -d -m -L /usr/bin/minicom
/bin/sleep 15
inputline=$(head -n 1 < /dev/ttyS0)
/bin/beep -r 1
   done
/bin/beep -r 3
while true
do
nice -n -20 /root/testinterface.sh
done
 exit 0
;;
  stop)
echo -n "stopp das Ding"
killpid=$(/bin/cat < /root/pid_of_interface)
/bin/kill -9 $killpid
kill -9 $(pidof minicom)
/usr/bin/screen -wipe
/bin/sleep 10
;;
esac
exit 0
~
~
"cut" is used, to extract the values for volume and station.
When you change the station, this is indicated by a very short beep ...
mpc is called, whenever either the volume or the station value changes:
Code: Select all
# Some configuration settings
# set -x

VOLUME=50
oldvol=50
trap 'kill $! ; exit 1' SIGINT  # exit on ctrl-c, useful for debugging
                                # kills the display.sh process before exiting
echo $$ > /root/pid_of_interface

# mpd setup
/opt/bin/mpc -q volume $VOLUME      # adjust this to suit your speakers/amplifier
oldstation=1    # var to keep track of what station we're playing


while true      # loop forever
do
   inputline=99 # clear input

   # Loop until we get a valid tuner position from arduino
     until [ $inputline -gt 99 ]
   do
    inputline=$(/usr/bin/head -n 1 < /dev/ttyS0)
   done

# echo "Inputline: " $inputline

VALUE=$(echo $inputline | /usr/bin/cut -c 1-2) # strip out the station part
# echo "vALue: " $VALUE


VOLUME=$(echo $inputline | /usr/bin/cut -c 3-4) # strip out the vol part

#echo "vOOlume: " $VOLUME

if [ "$VOLUME" -ne "$oldvol" ]
then
/bin/beep -f 6000 -l 30
/opt/bin/mpc -q volume $VOLUME
oldvol=$VOLUME
fi

   # if station has changed, we need to change position in the playlist

   if [ "$VALUE" -ne "$oldstation" ]
  then

# jetzt=$(/bin/date)
#echo $jetzt >> /root/played
#echo $VALUE >> /root/played
/opt/bin/mpc -q play $VALUE 2>> /root/mpc_log
/bin/beep -f 9000 -l 30
fi
oldstation=$VALUE
#echo $oldstation >> /root/played
done
================
I built a very simple amp, based on a LM386, 4 capacitors and a resistor.
It amplifies the volume by 20.
The sound coming out of the 0,5 watt speaker is not hifi quality .. but good enough for this project.
The amp is powered by arduino's 5 volt exit, so no additional battery is needed.
Still open / unsolved
==================
- - Before you boot, you have to switch the cable, that goes from arduino's TX to slug's RX to gnd. Otherwise the slug will not boot (described in AddASerialPort above).
- I never tried the serial way back from the slug to arduino. When I used the 2x16 lcd display, it showed the station names, that I had put in the arduino code
- Stick sometimes needs several minutes to boot. dmesg says "fs successfully recovered". I did a fsck on a linux box; the file systems seems to be ok.
- every second you hear a click from the serial port, that is cought by the amp ... may be I can improve the shielding.