

I have always struggled to take decent macro photos of small objects to document my hobbies. I finally got fed up with poor lighting and blurry shots and decided to build my own light tent to solve the problem. There are lots and lots of examples on the web showing how to build a DIY light tent. I wanted something cheap, small, and portable, so I merged ideas from a couple existing designs and used some scrap materials I had in the garage. In the end I managed to make a light tent for about $35.
The major components are:
- Light. I bought two desk lamps at Target for $9.99 ea. I bought 100W CFL lights from Home Depot to avoid the unwanted heat and energy usage of conventional light bulbs, $9 for two. I bought the color balanced type (3500K) which cost a little more but help accurate color reproduction in the photos.
- Frame. I used an old shoe rack, but almost anything can be made to work.
- Light diffuser. I tried bedsheets, which attenuated too much of the light. Instead I used tracing paper (vellum) that I had left over from another project.
- Background. I used poster board from Target. I bought one sheet each of 6 colors, for about $5.
- Tripod – I didn’t have one so I bought the cheapest one Best Buy had, around $30. Since I needed this for general use anyway, it’s not included in the total.
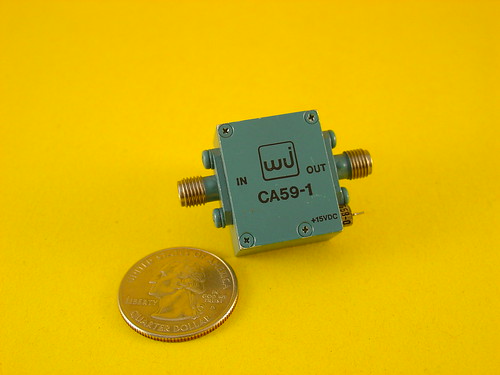
The results are really spectacular. Now I can take macro shots of small objects without the glare and lighting problems I have experienced in the past. For an example check out the photo below or see the complete set on flickr.
i made a light tent once out of kite fabric. the tubes and fittings from the kite builder store can help you to build you a nice and cheap frame as well. just in case you don’t have the stuff at home of you need bigger dimensions. mine was a cubic meter and worked really well.
Great idea, I love it! What do you use as a backdrop for such a large photo tent?
One more light tent design I forgot to mention is here: http://blog.makezine.com/archive/2006/03/pvc_light_box_light_tent.html
I’m thinking about copying their design for a PVC frame so I can take photos of bigger things in the future.