Mitch Altman and I are in the process of writing a book about Making Cool Things with Microcontrollers (for people who know nothing.)
The book features several DIY projects that use AVR microcontrollers. We’re aiming to teach absolute beginners how to solder, basic electronics, and the process of turning a cool idea into reality by using microcontrollers.
I wrote these instructions about setting up a working avr-gcc environment in Windows, Mac OS X, or Linux. Mitch and I felt that they could use some beta testing in the real world before bring included in the book, so we decided to make them available here. We also felt that they might help some people get started with AVRs before the book is available.
We want to make the process of writing and compiling code for the AVR simple and accessible, so we’re not using any fancy IDEs (eg. no AVR Studio). We also wanted to use the same software on all three operating systems, so Windows-only tools were out. Instead, we’re using avr-gcc, the compiler behind WinAVR, CrossPack, and Arduino.
I would appreciate any feedback on these instructions.
AVR Toolchain Installation Instructions – Windows
Note: At the time of this writing, following the step-by-step instructions below will result in a working AVR toolchain being installed on your computer. However, computers, operating systems, and software are constantly changing. This means that while these instructions are valid today, they may not be by the time you read this. If you run into trouble, fear not! Entering a few carefully chosen keywords into your favorite search engine will often yield just the information you need to resolve the issue.
Installing the AVR toolchain on Windows is fairly straightforward, thanks to a package called WinAVR. WinAVR includes all of the tools you need to get started working with AVR microcontrollers in one easy to install package.
WinAVR requires Windows 95 or later and approximately 250MB available hard drive space. The instructions below were developed and tested with WinAVR version 20100110 and include steps for both Windows 7 and Windows XP. The 64-bit version of Windows 7 is supported if digitally signed USB drivers are used.
To install the AVR toolchain within Windows:
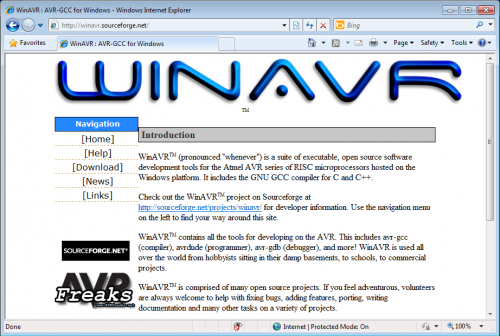
1. Open your favorite web browser and visit the WinAVR website at http://winavr.sourceforge.net/
Click Download and follow the link to the SourceForge.net WinAVR download page (http://sourceforge.net/projects/winavr/files/).
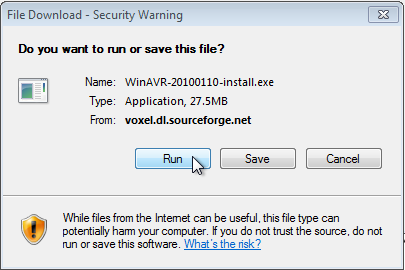
Click on the link to the latest version, which at the time of this writing is WinAVR-20100110-install.exe. When the download finishes, click Run to launch the installer. On some browsers, you might need to wait for the download to finish, find the file (look in your Downloads folder) and open it manually.
Some versions of Windows might require you to authorize the installer to make changes to your computer. Click Yes.
The WinAVR installer will open and ask you to select a language. (If you don’t see this dialog box, look around, it might have popped up behind your browser!)
Continue the guided installation, accepting the default options when prompted.
A few clicks later, and the WinAVR installation is finished.
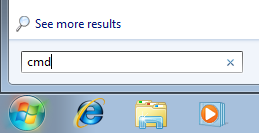
2. Open a Command Prompt. You can do this by opening the Start menu and clicking All Programs->Accessories->Command Prompt. As a shortcut, you can also type “cmd” into the Search bar.
3. You can test the installation by entering the command
avr-gcc --version
into the Command Prompt window. You should see the response
avr-gcc (WinAVR 20100110) 4.3.3
and a copyright notice. Note that the version number might be different.
4. To use a USB programmer such as the Adafruit Industries USBTinyISP, you’ll need to install some drivers.
You can download Windows drivers for the USBTinyISP from http://www.ladyada.net/make/usbtinyisp/download.html.
All versions of Windows should use the newer “Windows 7 x64 bit driver.” This driver contains a digital signature that the 64-bit versions of Windows require, but is also backwards compatible. If you run into problems with the newer driver, try using the older libusb v1.12 driver.
(AVRISP users: The drivers that come with the Atmel AVRISP mkII won’t work with the avrdude program that we will be using to program AVRs. Alternate AVRISP drivers can be downloaded from https://mightyohm.com/blog/2010/09/avrisp-mkii-libusb-drivers-for-windows-7-vista-x64/.)
Open the driver file archive you just downloaded and click the “Extract all files” button to unzip the drivers to a convenient folder on your hard drive.
The driver installation procedure is slightly different for Windows XP. If you are using Windows XP, skip to the separate Windows XP instructions below.
Windows 7: (for Windows XP, skip this section)
First, plug in the USBTinyISP. You’ll probably get the error message “Device driver software was not successfully installed.”
You can install the drivers by opening the Device Manager (Start->Control Panel->System and Security->System->Device Manager).
The USBTinyISP is shown with a small exclamation mark next to it, indicating that working drivers are not installed.
Right click on the USBTinyISP and select Update Driver Software to manually install drivers. When the update window opens, click “Browse my computer for driver software.”
Click Browse and select the folder where you extracted the drivers earlier.
You will get a warning that “Windows can’t verify the publisher of this driver software.” Click “Install this driver software anyway.”
The driver will install, and you should see the message “Windows has successfully updated your driver software.” Click the Close button.
The drivers are now installed. Close the Device Manager and Control Panel.
Windows XP:
Plug in the USBTinyISP. You should see the message “Found New Hardware” above the taskbar.
The Found New Hardware Wizard will start automatically. Select “No, not this time” to skip connecting to Windows Update and click Next to continue.
When the next window appears, select “Install from a list or specific location” and click Next.
To select the drivers for the USBTinyISP, check the box next to “Include this location in the search” and click Browse. Navigate to the folder where you extracted the drivers earlier. Click Next to install the drivers.
If the driver installation was successful, a window will open to inform you that the wizard has finished installing software. Click Finish to exit the Found New Hardware Wizard.
The USBTinyISP drivers are now installed.
If the Found New Hardware Wizard fails or never pops up, you can install the driver manually by opening the Device Manager, which can be accessed via the Hardware tab of the System Control Panel. Find the USBtinyISP (it will probably have an exclamation mark next to it), right click on it, and select “Update Driver.” Then follow the instructions above to install the driver.
5. To test the USBTinyISP, switch back to the Command Prompt window and type the command
avrdude -c usbtiny -p m168
Press enter while you watch the USBTinyISP’s red LED. The red LED will flash once and you should see the following message:
avrdude: initialization failed, rc=-1
Double check connections and try again, or use -F to override
this check.
avrdude done. Thank you.
If you don’t see the red LED flash, try executing the command again. The LED flashes quickly and is easy to miss!
The initialization failed error shown above is not a problem, it is displayed because there is no microcontroller connected to the programmer. At this point, if the red LED flashes, the programmer is working.
If you see the error message
avrdude: Error: Could not find USBtiny device (0x1781/0xc9f)
avrdude done. Thank you.
double check the USB connection to the USBTinyISP and make sure the green light is on.
This completes the Windows AVR toolchain installation. You are now ready to start programming microcontrollers!


Personally, I think it’s a mistake not to use AVR Studio. Yes, it’s somewhat clunky compared to, say, the Arduino IDE. But AVRDUDE? How many young folks want to type commands into a console?
AVR Studio is not open source or multi-platform.
Hello, i think that i saw you visited my blog thus i came to “return the favor”.I am attempting to find things to improve my site!I suppose its ok to use a few of your ideas!!