This is the third part of an ongoing series about building a low cost, open source streaming internet radio. If you haven’t already, check out part one and part two for some background about the project.
Hacking the Asus WL-520GU Wireless Router:
In the last part of this series, I selected the Asus WL-520GU wireless router as a suitable embedded platform for my Wifi Radio project. I have since posted some detailed specs on this impressive low-cost router, revealing it’s powerful Broadcom BCM5354 core, 4MB flash, and 16MB SRAM. Granted, there are many more powerful routers out there that have USB support, will run Linux in various forms, and have built-in WiFi. However, the WL-520GU does almost everything we need to build a streaming internet radio and costs under $50 (I have seen them for as little as $26 after rebate ), which is very impressive indeed.
To convert this router into a powerful embedded system, we need to make a couple modifications. First, we need to throw out the stock firmware. It turns out that this router, like many others, runs Linux from the factory. However, because it was designed to be a wireless router and not much else, the stock firmware doesn’t include a very wide set of features (and certainly was not intended to be accessed by the customer). Thankfully, there are several open source Linux distributions available that support this router, including my favorite, OpenWrt. In addition, Asus has made it fairly straightforward replace the stock firmware with our own custom Linux build which can include all the programs, drivers, and utilities we can cram into 4MB of flash.
Warning:
Before we start hacking the router, there are a couple things I should mention:
- From this point onward, your warranty is toast. Don’t even THINK about trying to send a modified router back to Asus for warranty service. In the end it hurts people like us, because Asus will try to make it harder for people to perform the same modifications in future products.
- You may inadvertently destroy your router. If you are not comfortable with the fact that a misstep during the reflash or a stray solder bridge could ruin your hardware, stop now. Sorry. If you really take a wrong turn, you could damage your PC as well, but this is extremely unlikely. If you do somehow damage your router or PC doing these modifications, I assume no responsibility for any damages!
This tutorial assumes that you have already established the router is basically working by assembling it, plugging it in and checking for it’s wireless signal and internal webserver. The user manual does a good job of leading you through this process, but don’t use the supplied CD – follow the advanced/manual instructions instead.
Accessing the internal serial port:
The OpenWrt install will be easier if we can find a way to access the internal serial port of the router. The built-in serial port gives us a way to view Linux boot and status messages and get shell access as well. The serial port will also come in handy later when we want to add a user interface to the radio.
You will need:
- A desktop or laptop computer with an open USB and Ethernet port.
- Your shiny new ASUS WL-520GU wireless router (R1.02)
- A strip of breakaway 0.1″ male header
- A FTDI-232-3V3 USB to serial adapter cable ($20 @ Adafruit) or some other means of connecting a 3.3V level serial port to your PC
- A small scrap of perfboard and a strip of female 0.1″ header (not strictly necessary, see below)
-and-
- A basic electronics workbench with ample light, a temperature controlled soldering iron, a solder sucker, solderbraid, wirecutters, and pliers. Servo Magazine recently held a contest to see who could build the best electronics workbench for under $100, the results should be helpful for anyone just starting out. If you’re uncomfortable soldering, find someone else to help you with this part at your local hackerspace.
Step 1 – Open the router
Remove the power cord and antenna (the base unscrews). Flip the router over and look at the bottom. You should see something like this:
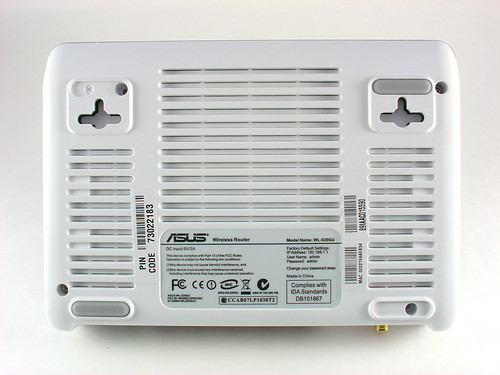
Note there are four screws that hold the router together, two are hidden underneath the rubber feet. The feet are stuck on really well, but persistent prying with a fingernail will get them off eventually. Remove the four screws and set them aside. The top cover should come off without too much trouble.
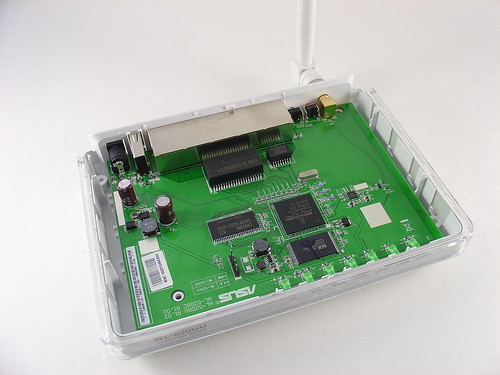
Now that the router is open, you should see something like this:
Step 2 – Add a serial port header
Remove the PCB from the plastic enclosure by gently pulling it up and towards you (ethernet ports facing away).
Just to the left of the ASUS logo in the photo below, you will see a 4-pin header that I have installed to access the internal serial port of the router, the router ships without this header. Instead, you will see four solder filled vias in a row in the same spot.
You will need to use your soldering iron and a solder sucker to remove most of the solder so that the header can be installed. A higher power soldering iron will help with removing solder from the first via on the left (mine is a 60W Weller WTCPT). This via connects to a ground plane which sucks heat away from the iron and makes the job more difficult. Be patient and persistent and you should be able to wick any remaining solder away with some soldering braid if necessary.
Break a 4-pin chunk of male header off the strip. Pop the header into the board and carefully solder it into place. If it doesn’t fit, chances are there is still some solder left in the vias. You should end up with something like this:
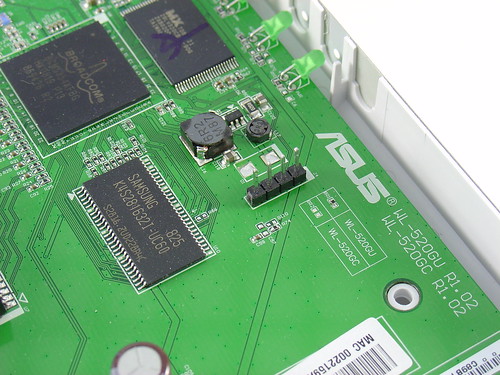
The pin functions are, from left to right in the photo:
GND TX RX 3.3V
Step 3 – Connect your PC
The FTDI-232-3V3 USB to serial adapter cable provides a handy way to add a 3.3V TTL level serial port to a PC or laptop. The cable has a flat connector on the serial end that can plug directly onto 0.1″ male headers like the one we are using on the router. Unfortunately, the pinout of the FTDI cable (given in the datasheet) does not match that of the router. To resolve this, you have two options:
- Use a tiny screwdriver to pull out the pins from the housing at the cable and rearrange them. Do not connect anything to the 3.3V pin on the router, and swap the TX/RX so that the TX on the router feeds RX on the cable, and vice-versa. Don’t forget to connect the grounds! The downside of this is that now you can’t use the FTDI cable for things like the Boarduino without swapping the pins back.
-or-
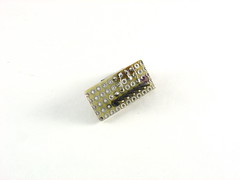
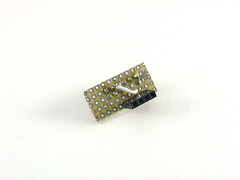
- Fabricate an adapter board using a small piece of perfboard and some headers, shown below (click for a larger version):
Here is a schematic of the adapter board:
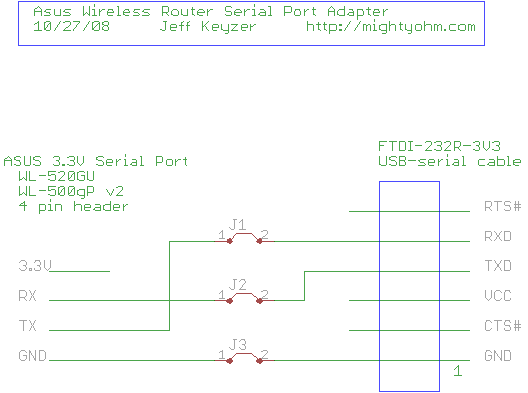
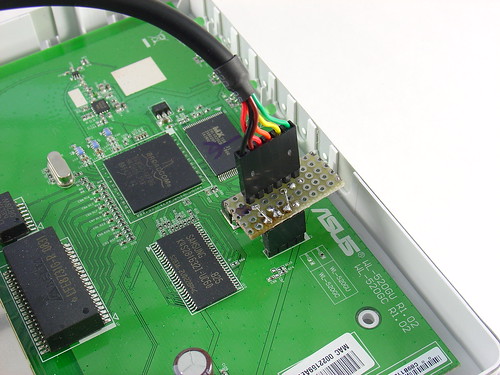
Shown here are the cable and adapter installed on the router. Make sure the ground side of the cable is connected to the pin on the header that is opposite from the fat angled trace (the 3.3V line). Ground is the black wire, on my adapter I marked this with a black dot so I won’t forget and plug it in backwards.
Step 4 – Test the connection
Plug the cable into your PC (you may need some drivers) and open your favorite terminal program. (I like Zterm for the Mac or Hyperterminal on the PC.) Using the terminal program, open the serial port corresponding to the FTDI cable (something like usbserial-FTDQ23LB on the Mac or COM3 on the PC, but your setup may be different.) Set the port options to 115200 baud, 8N1.
Connect the antenna and power supply to the router and plug it in. You should see something like this appear in your terminal program:
Decompressing..........done
CFE version 1.0.37 for BCM947XX (32bit,SP,LE)
Build Date: Thu Mar 6 10:05:04 CST 2008 (root@localhost.localdomain)
Copyright (C) 2000,2001,2002,2003 Broadcom Corporation.
Initializing Arena
Initializing Devices.
Boot partition size = 131072(0x20000)
et0: Broadcom BCM47xx 10/100 Mbps Ethernet Controller 4.130.31.0
Total memory: 16384 KBytes
CPU type 0x29029: 240MHz
...
If you do, congratulations, your serial port is working!
The lines that scroll by are boot messages from the Linux kernel of the stock firmware on the router. These messages give you a lot of information about the hardware in addition to information about the operating system and software drivers. Here is a complete transcript of the boot log from my router. If you wait a couple minutes for the router to finish booting and hit enter, you should see a command prompt. From here you can explore and play around with the stock firmware, there is really not much to do here until we reflash the router with OpenWrt.
That’s it for part three. In part four, I’ll talk about installing OpenWrt and connecting the router to your wireless network.
Update: Part four is now available.
Update 2: There is a new Wifi Radio Discussion Forum, hop over there to ask questions about the project or see what other people are working on! (4/12/09)


