
In my previous post about the Wifi Radio project I’m working on, I concluded that the Asus WL-520GU wireless router was the perfect choice for an embedded wireless platform, thanks to its builtin 802.11g WiFi, Linux support, and extremely low cost. (In fact, the price after rebate has dropped since my last post – now would probably be a good time to buy one if you’re thinking about hacking it into something eventually).
Here are the specs on this router, based on an inspection of the hardware and the stock firmware Linux kernel boot log (the complete log is here).
- CPU: Broadcom BCM5354KFBG SoC @ 200MHz (240MHz?)
- Builtin 802.11g wireless transceiver
- Builtin 10/100 ethernet switch
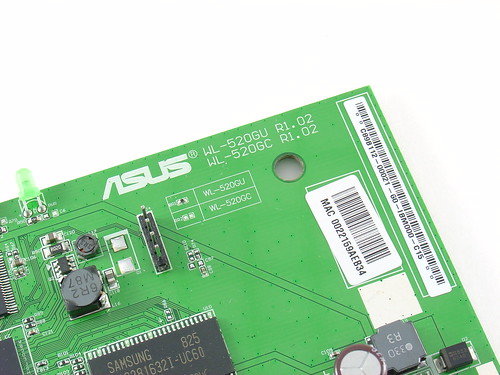
- Core supports 2 serial ports, only 1 is available on the PCB (installed 4 pin header shown in photo above)
- RAM: 16MB Samsung K4S281632I SRAM
- Flash: 4MB MX 29LV320CB
- One USB 1.1 port (USB 2.0 support is broken according to the folks at OpenWRT)
- SiGe Semiconductor 2528L discrete RF Power Amplifier IC
- One external TX/RX whip antenna (RPSMA), internal diversity RX antenna on PCB
- Internal 3.3V DC-DC converter
- PCB Dimensions: 4.0″ x 5.6″
- Supply: 5V @ <2A
Here are some images of the PCB, click for a larger version.
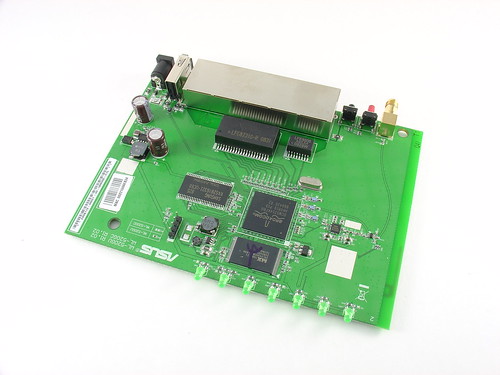

Here’s a closeup of the Broadcom BCM5354 SoC – the brains of the router. It is surrounded by a 4MB MX flash chip above and a Samsung 4MB SRAM chip on the right.

Overall this is a great little router and an even better platform to build an embedded Linux system, provided you don’t need USB 2.0 support. If you do, look at the WL-500gP v2 instead, it has two working USB 2.0 ports (in addition to much more flash storage and RAM).

