Category Archives: Electronics

My new oscilloscope – the Agilent DSO1014A

New Oscilloscope

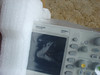
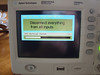
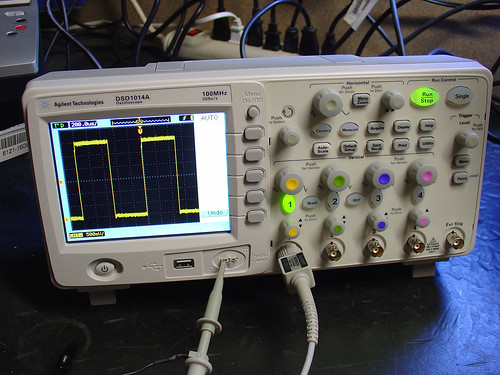
Over the Memorial Day weekend I had a chance to spend a little bit of time with my new Agilent DSO1014A oscilloscope.

The Agilent 1000 family was just introduced on May 4th, 2009.  Since it’s a brand new model, I had to look around a bit to find one in stock at one of Agilent’s distributors.  Agilent quoted a 6-8 week leadtime and said I probably wouldn’t be able to find one anywhere before late June, but with a little searching I spotted one at Newark Electronics.  Two days later, it was running a self calibration in my lab.  Thanks, Newark!

The DSO1014A is a digital storage oscillscope.  The primary advantage of a digital oscilloscope over a traditional analog scope is that waveforms can be easily captured and analyzed even after the original signal is long gone.  Brief transients in the input signals can be viewed by carefully triggering a digital storage oscilloscope.  This is almost impossible to do with a simple analog scope.

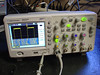
Here’s a brief feature list for the DSO1014A along with some of my notes:

  • 100MHz bandwidth (the higher end DSO1024A has 200MHz BW)
  • 4 channels (most low cost scopes only have 2, this was a big selling point)
  • 1GS/s sampling rate per channel (pretty standard), 2GS/s in half channel mode (impressive!)
  • 10kpts/channel record length, 20kpts/s in half channel mode (another big selling point for me)
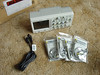
  • front panel USB connector for recording screenshots to USB stick (yes!!!)

This scope will be a huge upgrade from the analog scope I have been using (an ancient 20MHz Hitachi V212).  While it won’t be able to view USB 2.0 eye diagrams, it should be more than good enough for general purpose use around the lab.

To see more photos of the scope, check out the full album on Flickr.

New Oscilloscope
New Oscilloscope
New Oscilloscope
New Oscilloscope

New Oscilloscope
New Oscilloscope
New Oscilloscope
New Oscilloscope

Keith’s Hotplate and PID Controller Teardown Pics

Keith of Keith’s Electronics Blog made a PID-Controlled Soldering Hotplate based on the one I fabricated earlier this year.  He’s already using it to build the stepper controller PCB for the MakerBot CupCake CNC!

He also posted a bunch of teardown photos (like the one shown below) of the CD101 PID Controller from Sure Electronics.  I suspect the CD101 is a cheap knockoff of an RKC PID controller since I can’t find the part number on RKC’s website, even though the front panel clearly says RKC on it.  I guess at $40 you can’t ask too many questions, the price is right…

Copycat PID-Controlled Solder Hotplate « Keith’s Electronics Blog.

The Fat Man and Circuit Girl

The Fat Man and Circuit Girl Cast 9 from Jeri Ellsworth on Vimeo.

I don’t know why it took so long, but recently someone turned me onto The Fat Man and Circuit Girl show, which has been airing on the net for almost six months now.  This is definitely the quirkiest and most entertaining electronics themed webcast I have ever seen.  The episode above includes an awesome segment about making a floppy drive reverb machine and thoughts on brewing coffee with PID, which reminded me of some other projects I have worked on…

The Fat Man and Circuit Girl are:

George Sanger – (fatman.com)

Musician, artist, composer of music for several video games, most notably Maniac Mansion on the NES and Wing Commander.

Jeri Ellsworth – (blog, twitter, flickr, vimeo, youtube)

Self taught electrical engineer.  Designer of the C64 DTV.

I had a chance to meet George and Jeri at NOTACON in Cleveland this month.  They are as entertaining in person as they are on video!  Jeri told me that she will be at the Maker Faire in San Mateo this year, showing off her Easy-Bake Chip Lab.  I am really looking forward to seeing it!

They have a website for the show at fatmanandcircuitgirl.com.  You can also follow @fmandcg on twitter.

Who needs television when you can stream a show like this?

APRS Tracker

APRS Tracker

This week, my brother is relocating from the San Francico Bay Area to Texarkana, Texas.  I’m helping him move, so for the next two weeks we’ll be on a road trip through California, Arizona, New Mexico, Texas, and maybe a little bit of Oklahoma.  We’re planning to see the Very Large Array, visit Truth or Consequences, and check out The Black Hole in Los Alamos.  That is, if the trailer stays connected and we don’t break down too many times on the way.

I though this would be a good opportunity to dust off my APRS tracker so friends and family can watch our progress.

What is APRS?

APRS, short for Automatic Packet Reporting System, is a radio network that uses amateur radio frequencies to relay short messages.  Think of it as a precursor to twitter, developed 20+ years ago by Bob Bruinga, WB4APR.  The messages usually contain GPS coordinates, and they are relayed via radio to internet connected stations that send the data to the APRS-IS network.  Database servers, such as findU, cache the packets so that client software can access them without needing a radio or realtime access to the network.

The coolest client I have seen so far is aprs.fi, a clever mashup of APRS and Google Maps:

APRS map of San Francisco

The hardware:

I made this APRS tracking box a couple years ago, so I’m a little fuzzy on the construction details, but it consists of the following parts:

  • A Trimble ACE III GPS module, originally used in a police car, $5 on eBay.
  • An external mag-mount powered antenna for the GPS that I found at HSC, also $5.
  • A Tinytrak3+ microcontroller-based APRS encoder and modem, $30
  • My old Kenwood TH-79A handheld 2 meter/144-148 MHz ham radio
  • A mag mount whip antenna for the HT, found at the electronics flea market.
  • An aluminum box, probably the most expensive part.
  • Some cables to glue all the pieces together, mostly salvaged from my junk box.

The APRS tracker acquires a GPS fix and the current GPS time.  Every so often (fully configurable), it transmits my position over the radio, where it is received by other APRS relay stations in the area.  Speed, direction, and altitude are also included with the position packet.  I connected a piezo buzzer to the TX signal so I hear a beep when the position is transmitted.  Within a few minutes, a point corresponding to the position shows up on the map at aprs.fi or in the findu database.

It’s really neat to play with, especially on long trips.  On a trip to Moab two years ago, my position was received by the APRS network even in areas with no cell coverage, which included most of Utah!

Note that to use the APRS system, you need to have an amateur radio license.  If you’ve ever been interested in amateur radio, this is a really good reason to get your license and start experimenting!

Chuck Houghton – WB6IGP

Chuck WB6IGP operating his lasercom system

Ed. note: This is a guest post by a good friend of mine, Tony Long, KC6QHP.  Hopefully Tony will be contributing more to the blog in the future and we’ll get to see some of the interesting things he’s working on in his lab in SoCal.  Let’s all welcome Tony to the blog! – Jeff

By 1995 I had been a licensed ‘ham’ for 4 years.  I was in the 11th grade and interested in a putting together a far-out science fair project.  Over the next two years I worked with two hams, mentors, and friends to get the project done.  One of them was Chuck Houghton, WB6IGP.  He and Kerry Banke N6IZW started the San Diego Microwave Group back in the 1980’s.  What they started was an informal group that still meets in the garage at Kerry’s house in La Mesa once a month to talk about and work on microwave ham radio projects.  This group has been highly influential in the interests and careers of myself and Jeff.  We both went to college in San Diego and attended these meetings and just as importantly, had a great source of parts and articles from Chuck.

Chuck, who was 68, passed away peacefully in his home on April 29th.

Chuck and Kerry started out on the microwave bands by using surplus microwave burglar alarm systems and modifying them for amateur radio use.  Chuck was in some ways an early version of many DIY electronics bloggers of today.  He not only did experiments, and built interesting projects, he wrote about them, told others how to do it, and supplied printed circuit boards, kits of parts, and so on.  He wrote a monthly column in 73 magazine and later in CQ-VHF detailing his experiments.   His reach was worldwide, and no doubt has enabled the microwave amaetur radio hobby to flourish.

So, to Chuck I bid a farewell and 73.  You will be missed but you will be remembered well!

-Tony KC6QHP