Tag Archives: Electronics

Poll: Who is your favorite prototype PCB vendor?

As I wait for my AVR High Voltage Programmer Shield PCBs to come back from BatchPCB, I’m starting to wonder what prototype PCB services other people are using for their boards.

Ladyada has a PCB Cost Comparison Calculator that shows the significant differences in price between various low volume PCB vendors, but what’s missing from the chart is the answer to: What vendors are people actually using?

If the cheapest fab house is also the best, obviously the more expensive vendors wouldn’t be around, would they?  Unfortunately, it’s usually not that simple, cheap usually means slow, or low quality, or both.

I know that some visitors to this site make prototype PCBs at home and others send them out to be fabricated.  How do you get your prototype boards made?  Vote below.

[poll id=”2″]

Improvements to the DIY PID-Controlled Soldering Hotplate

Improvements to PID Controlled Hotplate

Last week I posted about the DIY PID-Controlled Soldering Hotplate I designed and built to improve my surface mount soldering capabilities.

I mentioned one issue I was having with the hotplate on flickr.  Specifically, the aluminum baseplate was getting too hot for comfort (literally) when I set the hotplate to solder reflow temperatures (180-220C) for more than a few minutes.  At the time I thought it was due to radiant heat from the upper aluminum block transferring to the bottom plate.  I later discovered that the ceramic spacers I used to hold up the hotplate were much more thermally conductive than I thought and the screws I used to attach the baseplate to the spacers were burning hot before the rest of the baseplate.  It was conducted heat, not radiant, that was the primary cause of the problem!

McMaster-Carr to the rescue!

I was able to resolve the issue by reducing the diameter of the ceramic spacers from 1/2″ to 1/4″ and using all stainless hardware to attach the spacers.  Now the baseplate stays relatively cool even with the hotplate at high temperatures for long periods of time.

View the complete set on flickr.

Improvements to PID Controlled Hotplate

HSC Electronics Clearance Annex Open

Last week I stopped by HSC Electronics in Santa Clara to pick up a few parts for my PID Controlled Soldering Hotplate project.

Earlier this year, there was an announcement that HSC was moving because their landlord would not renew the lease on the building they have occupied for the past 15-20 years.  At the last minute they were able to negotiate a lease for half of their original space, forcing them to vacate what was previously the warehouse/mail order side of the building.

So far, the evidence of these changes to their customers has been very limited.  Maybe there were a few extra items at the annual sidewalk sale and some extra bins of parts on the showroom floor, but overall things looked pretty much the same – until my most recent visit.

Now there is a new HSC Clearance Annex open to the public in what was formerly the employees-only warehouse space:

New HSC Clearance Area

I found some neat things inside: IEC line filters, variable inductors, an assortment of crystal oscillators, bags of PCB mount right angle RCA jacks.  Most items are $1-2 and many come in bags of 10-100 for that price.

New HSC Clearance Area

They also had huge boxes of assorted hardware and electrolytic capacitors – you can create your own grab bag for $1.  Usually these are only available during the sidewalk sales and are a surprisingly popular attraction:

HSC Warehouse Clearance Sale

If you’re in the area, HSC might be worth a visit.  HSC is located at 3500 Ryder Street, Santa Clara, California 95051.

I also recommend a side trip to Weird Stuff and Fry’s Electronics, both are within a few miles of HSC.  Stop at all three and you are pretty much guaranteed to satisfy your appetite for electronics.

DIY PID Controlled Soldering Hotplate

PID Controlled Hotplate

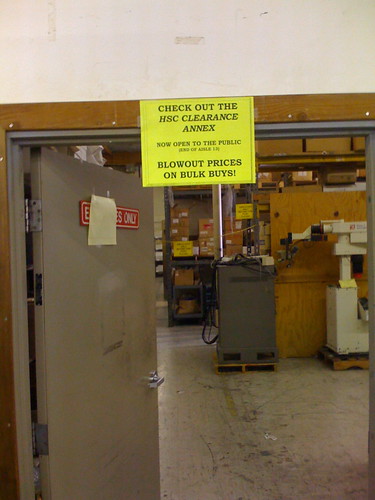
In preparation for my Arduino-based AVR HV Programmer boards coming back, I decided to step up my home lab surface mount soldering capabilities.

Step one was to find a cheap stereo zoom microscope on ebay, with 7-32X magnification, perfect for working on surface mount devices.  One of my biggest frustrations in the past is that with a cheap magnifying ring light, I can’t actually see what I’m working on – not any more!  I’ll post some photos of the microscope when it comes.

Step two was to build a soldering hotplate.  I like using a hotplate for surface mount soldering because you can actually watch the board as the solder paste reflows, and manually add/remove/nudge components around with a set of tweezers.  This is great for engineering work where you may still be making component changes and other tweaks to the board.  Mass production is probably best left to a reflow (aka toaster) oven.

I posted a few photos of the hotplate on flickr, which ended up on Hackaday.
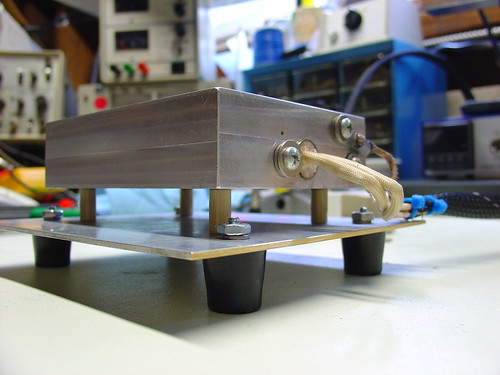
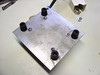
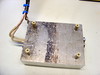
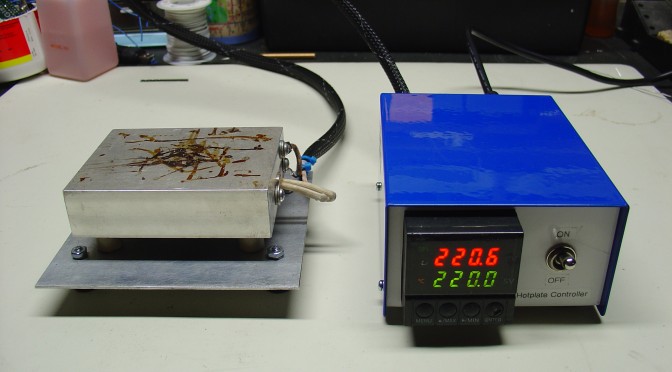
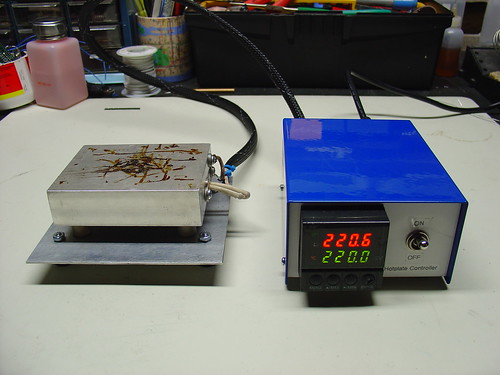
The hotplate:

PID Controlled Hotplate

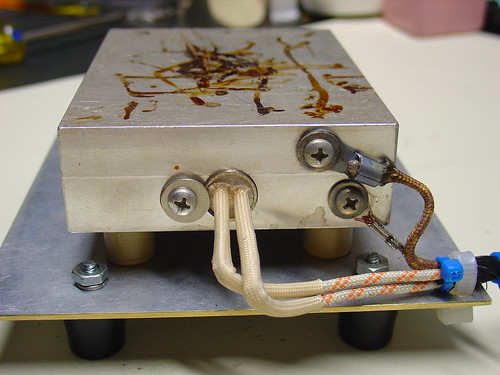
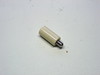
The heater is a 1/2″ 500W, 120VAC cartridge heater I bought from McMaster-Carr for about $25.  The hotplate itself is a 3x4x1″ chunk of aluminum that I machined with a carefully sized hole just below the center for the heater to slip into, as shown.  A type-K thermocouple (top right) measures the temperature and provides a signal to the controller.  Ceramic standoffs insulate the hotplate from the bottom aluminum baseplate.  For safety, there is also a ground strap, shown on the bottom right.

This the second PID controlled project I have done, the first was my PID Controlled Solder Paste Fridge.

The controller:

PID Controlled Hotplate

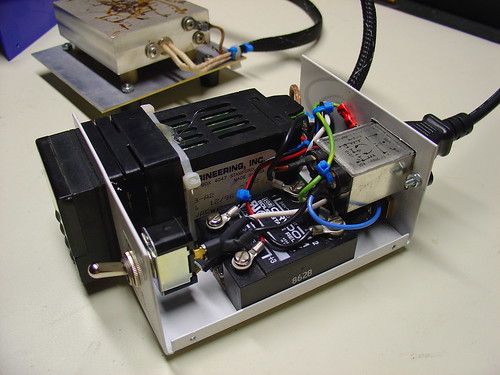
The controller box contains an Omega CN77000 series PID controller and an IR/Crydom 240V 40A (overkill!) D2440 Solid State Relay (SSR), along with a power switch, fuse, and power connector.  The PID controller and solid state relay were both found at a now-defunct Silicon Valley surplus store for a few bucks each.  A 3′ umbilical cable connects the controller to the hotplate.

60/40 leaded solder reflows at about 185C, and lead-free solder is around 200-230C depending on the alloy.  (Wikipedia has a good list of reflow temperatures.)  The hotplate can easily reach these within a minute or two from room temperature and could get much hotter if necessary.

It can also be used to cure epoxy and perform any other tasks that require a precisely controlled heater – this could be the world’s most overengineered coffee warmer, if not for the dangers of lead poisioning.

Update: I just posted some more information about the microscope.

EIA Resistor Values Explained

Have you ever wondered why standard 5% resistors have strange values, like 330 and 470 Ohms, instead of nice round numbers like 300 or 500 Ohms?

It turns out that standard resistor values form a preferred number series defined by the EIA.  5% values are part of a standard called E24.  The standard is based on a geometric series – each value is approximately 1.1 times the previous one in the set.

This scheme ensures that the resistance values are separated by an amount approximately equal to twice their tolerance.  Since a 5% tolerance resistor could actually be plus or minus 5% of the nominal value, the E24 range spaces the values by 10%.  That way, where the tolerance range of one value leaves off, the next higher value picks up, with the smallest possible overlap or gaps in resistance.

For example, 330 Ohms + 5% = 347 Ohms.  The next highest E24 value is 360 ohms, and 360 Ohms – 5% = 342 Ohms.  There is a small overlap of 5 ohms because the values don’t follow the geometric series exactly (due to rounding to the nearest 10 Ohms).  Spacing resistances significantly closer than their tolerance range would be silly – a 330 Ohm resistor could in reality be larger than a resistor marked 335 Ohms if both resistors had a 5% tolerance.

Here is a chart of the E24 resistor values between 100 Ohms and 1k:

E24 Resistor Values
E24 Resistor Values

As you can see in the chart, E24 values are nicely spaced between 100 and 1k Ohms.  Below 100 Ohms or above 1k, the series simply repeats.  The name E24 comes from the fact that there are 24 values per decade of resistance.

Other EIA standards define the values for other tolerance ranges.  Here is E96, commonly used with 1% resistors:

E96 Resistor Values
E96 Resistor Values

In this case, each value is 2% larger than the previous value, yielding 96 values per decade!

It’s nice to know the range of possible resistor values when you are designing circuits.  This quickly answers the question of whether you can use 573.25 Ohms in your circuit.  (No.  Well, not easily.)  There are lots of EIA tables online, including some that are colorful and some that can be printed and stuck on your wall.

The EIA values are also part of IEC standard 60063, so you may see them referred to as EIA or IEC resistance values, just to make things more confusing, but the values are the same.