
Follow these links for more information about the workshop at Chaos Camp, and the Geiger Kit itself.
Category Archives: Projects

Introducing the MightyOhm Geiger Counter Kit
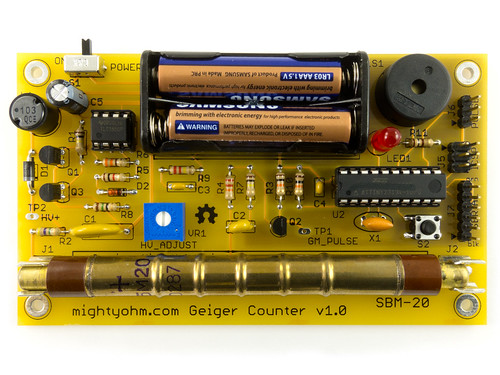
Look! A new kit!
I admit that I’ve been working on this one for a while. Sorry for the lack of updates, but I have been far too busy doing everything last minute and fixing bugs to post here!
I designed this Geiger Counter kit specifically so I could give a workshop at Chaos Communication Camp 2011. I just couldn’t fly halfway around the world only to show up at a hacker conference empty-handed!
My workshops are tentatively scheduled for Thursday and Saturday. I’m not bringing very many kits, so if you’re coming to Camp, sign up early!
More information about the kit is here. I’ll be adding more documentation over the next couple weeks.
Hopefully I’ll also be showing off this kit next month at the OSHW Summit and the NY Maker Faire.
CD101 PID Controller stop mode issue
The CD101 is an inexpensive (under $40) PID controller sold by Sure Electronics. Aside from the incomplete documentation that is shipped with the unit, I’m pretty happy with this controller. I’m planning to use it to replace the failed PID controller that controls my soldering hotplate.
I am having one small issue with the CD101 – stop mode doesn’t seem to do anything. By that I mean it doesn’t disable the outputs or seem to affect the controller in any way. Based on my interpretation of the user manual, the outputs and alarms should be disabled in stop mode. This is mostly an annoyance in my application – if I want to disable the hotplate I’ll just turn it off. However, I can imagine that the lack of a standby mode might cause problems in some applications.
I contacted Sure Electronics about the problem, and they requested a video. I figured I might as well post it here, since I went through the trouble of making it and everything. 🙂
By the way, since it can be hard to find information on this controller (eg. how to change from Fahrenheit to Celsius display), I have been slowly putting together a wiki page for the CD101.
PS: The video was shot with my new Canon PowerShot S95, which seems to take great footage, except that there is no autofocus or zoom control while shooting. (?!)
Improved firmware for USBTinyISP fixes USB issues

I am a big fan of VirtualBox. I have used it in various forms over the past couple years: to run Windows within Linux, Linux within Windows, Linux within OSX, Windows within OSX, etc. It is fast, powerful, configurable, and best of all, free.
However, there is one major disadvantage to using a virtual machine for hardware development. Sometimes USB devices don’t get along with the VM very well. What’s worse is that sometimes certain combinations of host and guest OS will work for a given USB device, while others won’t. This can make debugging very frustrating!
I recently set up VirtualBox on my Windows 7 x64 PC so that I could run Ubuntu 10.04 alongside Windows. Everything was going great until I plugged in my Adafruit Industries USBTinyISP so I could flash an AVR from within the Ubuntu virtual machine.
Instead of seeing the USBTinyISP show up on the VM, I got something like this:

The USBtinyISP is shown as “State: Captured:” in the VirtualBox USB device menu but there is no checkmark along side it, it doesn’t show up in lsusb, and avrdude can’t find it either.
When I tried to attach the USBtiny in Virtualbox again, I got this error message:

Bad news.
I tried various combinations of relaunching VirtualBox, rebooting, adding USB filters to the VM, unplugging, replugging, etc. No dice.
I decided that there must be an issue with the USB stack running on the USBTinyISP. Most USB devices can handle the hand-off between the Windows host and the Ubuntu virtual machine, but for some reason the USBTinyISP can’t. (It’s also worth mentioning that the Atmel AVRISP mkII programmer doesn’t work with Virtualbox either. It shows up but can’t flash a device. I’ll have to look into this someday, but since I mainly use the USBTinyISP, fixing the AVRISP wasn’t a priority.)
The firmware that powers the Adafruit USBTinyISP is based on Dick Streefland’s usbtiny project. Dick has released a couple more revisions of his code since the v1.3 release that Limor Fried used to create the USBTinyISP v2.0 firmware. There have been a few bug fixes and improvements to the code, including some that address USB enumeration/communication issues. In addition, the usbtiny code now includes a branch specifically for the USBTinyISP. A pre-compiled hex file is provided for easy flashing to an ATtiny2313.
I was hopeful that these fixes might solve my Virtualbox problems, so I downloaded Dick’s new usbtiny-1.5 source and used my spare AVRISP mkII (within Windows) to burn the main.hex file to a spare ATtiny2313.
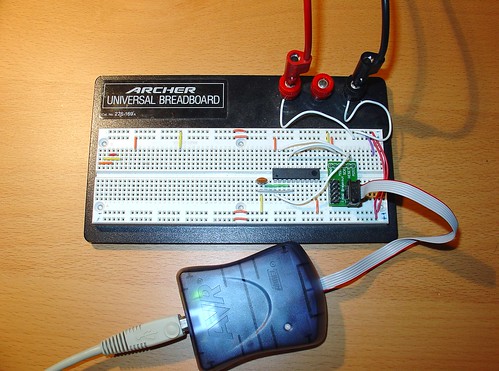
The USBtinyISP source sets the fuses on the ATtiny2313 for an external clock, so I had to wire up a ceramic resonator (small orange blob to the lower left of the AVR) to verify the AVR after setting the fuses. You can see my Sparkfun AVR ISP adapter on the right. I also wired up an external 5V power supply (the test leads at the top of the breadboard).
After burning the new usbtiny-1.5 firmware to the ATtiny2313, I installed it in my USBTinyISP and connected it to my computer.
At first, I still couldn’t get the USBTiny to attach to the VM if I plugged it into my PC and then selected it from VirtualBox’s USB menu.
However, when I created a USB filter in VirtualBox for the USBTinyISP and restarted the VM, it started working! This was a huge improvement over the original firmware, which never worked once, despite all of the combinations I tried!
Here is the USB filter setup, accessible from the VM settings:

Note that the revision is now shown as 0105 (instead of 0104 with the old usbtiny firmware):

lsusb shows the USBTinyISP (1781:0x9f Multiple Vendors) and avrdude no longer complains about finding the programmer. (The initialization failed message shown below is because I didn’t have an AVR connected.) The red LED on the USBTinyISP flashes when I run avrdude – a sure sign that the VM is communicating with the programmer.

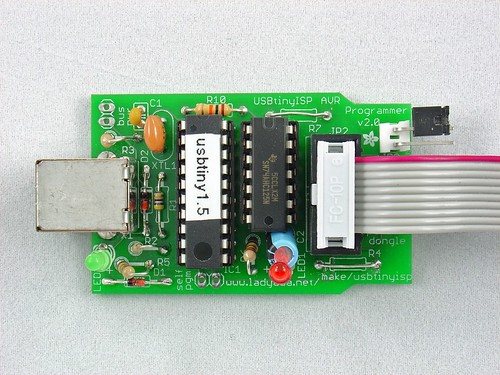
Here is my modified USBTinyISP, with the reflashed ATtiny2313 and shorted R4 & R7 (handy for programming devices that try to pull up/down the SCK/MOSI lines!)
I hope this helps anyone else who is trying to get the USBTinyISP working in Virtualbox on Windows. It may help solve other USB problems as well – the fixes in the newer usbtiny code may apply to other situations as well. If you are having problems with USB and the USBTinyISP, try upgrading the firmware and post your results here!
Budget mini-ITX home server build
For the past three years, I have been using a Linkstation Live for my home server. When I bought it, it seemed ideally suited to my needs – it’s small, consumes under 30W full-load, and can be hacked to run Linux (I was running Debian). It’s primary purpose is to serve files (functioning as a NAS device, as Buffalo intended), but I also use it for some more interesting things, such as hosting a subversion repository, serving music with mt-daapd, and managing a small VPN.
I started outgrowing the ARM9-based Linkstation at least a year ago – it was bogging down under the load of the many services it was running. However, earlier this year Debian Etch became unsupported, meaning that I was no longer receiving security updates – a potentially major problem for a server that has a few ports open to the ‘net.
I started thinking about building a replacement using more modern, faster parts, but still keeping the server’s footprint small – both in terms of space and energy consumption.
After doing some research, I discovered the mini-ITX standard for motherboards and the Intel Atom D510 dual-core processor. When combined with the right case, these would yield the perfect home-server for my needs.
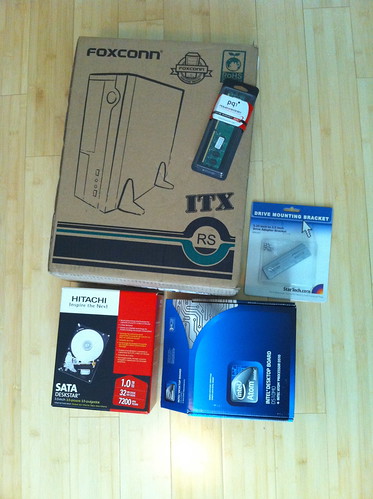
Here’s my build list. All parts are from Newegg.com:
Foxconn RS233 Black+Light Silver Computer Case – $44.99 (includes 150W PSU)
Intel BOXD510MO Intel Atom D510 Mini ITX Motherboard/CPU Combo – $79.99
PQI POWER Series 2GB 240-Pin DDR2 SDRAM DDR2 800 (PC2 6400) Desktop Memory – $38.99
HITACHI Deskstar HD31000 1TB 7200 RPM SATA 3.0Gb/s 3.5″ Internal Hard Drive – $64.99 (no longer listed @ Newegg)
SAMSUNG Spinpoint F3 1TB 3.5″ SATA 3.0Gb/s Internal Hard Drive -Bare Drive – $58.99 (a good substitute)
StarTech BRACKET Metal 3.5″ to 5.25″ Drive Adapter Bracket – $11.99
(For mounting a 2nd hard drive.)
Athena Power 10 ” Extension & Conversion Four-In-One9 – $6.99
Xion XON-DRBY525MB 5.25″ Driver Bay Cover Kit, Mesh, Black – $9.99
Note: Prices listed are current as 9/17/10 and are subject to change.
The total for all parts at the time I bought them was just under $250 (excluding shipping). Not bad! As of today (9/17/10), the prices have gone up slightly and the total is $257.93, although the Hitachi hard drive I bought has already been discontinued. Newegg frequently has deals on 1TB 3.5″ drives, so finding another one in the $55-$65 range should be pretty easy if you look around.
Here are most of the parts waiting to be assembled:
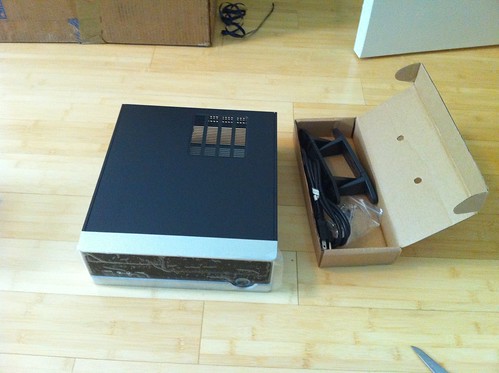
I spent a lot of time looking for a case, and I’m extremely happy with the Foxconn RS233 Mini ITX case I found.
Everything fit very nice inside, including a 2nd 3.5″ hard drive I had lying around that is used for backups. (The 2nd hard drive is installed in the 5.25″ bay, using adapter brackets.)
I added a short power supply extension cable to the motherboard power connector. This is because the 150W PSU that comes with the Foxconn case has a short power cable that can’t reach the motherboard power connector without stretching. It can be forced to fit, but the extension was inexpensive and gives me some peace of mind.
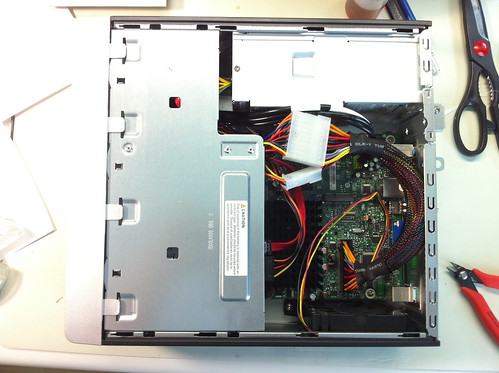
I initially had some problems with hard drive temperatures, but installing this clean-looking grill in place of the 5.25″ bay cover solved that. For testing, I just left the cover off the bay completely, which provides great ventilation but allows cat hair to rapidly collect inside the case.

I also covered the case’s top vent to keep the exhaust fans from sucking air through there instead of through the front of the case (past the hard drives and CPU).
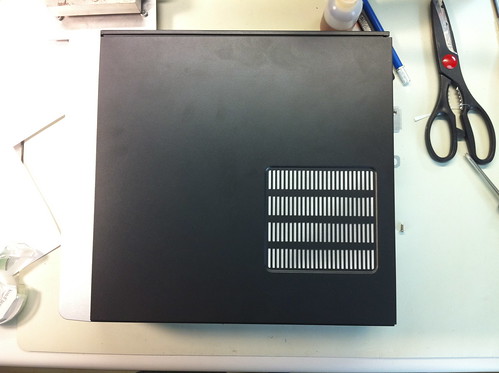
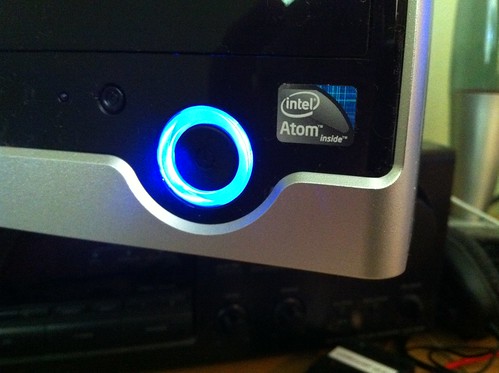
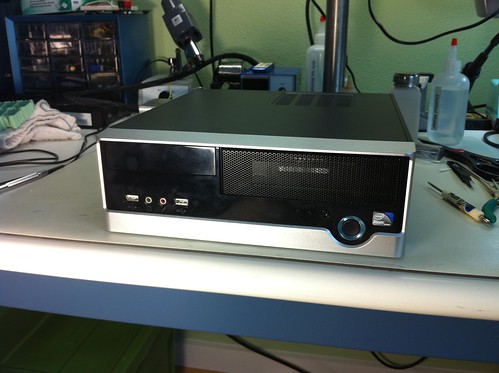
Here is the finished server. It’s small!
I spent a couple evenings installing and configuring Ubuntu Server 10.04 LTS, which I am very happy with so far. It did force me to learn how to completely install and configure Ubuntu via the command-line (Server doesn’t install a GUI), but it was all stuff I mostly knew already, and I probably gained some geek-cred. 😉
While I still have a few things left to set up (OpenVPN takes a bit of configuring), I’m very happy with the performance of this box. While a dual core Atom is nothing compared to a typical desktop machine today, this machine is lightning-fast compared to the 200MHz ARM9 it replaced. For a small home server, this is a perfect solution.
Power consumption is about 35W with both drives spinning, about 30W idle. Just a few watts more than the Linkstation, for a system with >1.5GB more memory and what feels like 10x the processing power!