
Cool carved pumpkins courtesy of the UCSD Jacobs School of Engineering blog. (my alma mater!)

Cool carved pumpkins courtesy of the UCSD Jacobs School of Engineering blog. (my alma mater!)

This week there have been a couple minor updates to the AVR HV Rescue Shield:
This weekend I hosted a post-Halloween kit building party at MightyOhm HQ.
Nine close friends built Conway’s Game of Life kits from Adafruit Industries. This is my favorite kit for these kinds of workshops because it’s easy for beginners to complete in about 2 hours, and when everyone is done, you can wire all of the kits together to create one large cellular automata display. The last time I helped people build this kit was at a Make:SF workshop at the TechShop in Menlo Park.
Here’s a timelapse video of the afternoon, shot with a Logitech QuickCam Vision Pro webcam on an Eee PC 4G running Booru Webcam 2.0.
The capture interval was 5 seconds. I used Quicktime Pro to stitch the images together at 15fps and iMovie to add titles and music (Turbo Outrun by FRP from remix.kwed.org.)
I wore my Halloween costume for most of the afternoon. What am I? Most people on the streets of San Francisco had no idea…

Safety first!

Stuart was the first to finish his kit:

Soldering the kits together to form the matrix:

Nine happy kit-builders with the 3×3 matrix they created with their finished kits:

And lastly, a video of the 3×3 matrix in action:
Three people had little to no soldering experience at the beginning of the afternoon. Everyone who came went home with a working kit. Success!

Volume 20 of Make: magazine, which hits newsstands on November 15th, includes an article I wrote about DIY Telephony titled “Retro Wireless Handset.”
The article is based on my Bluetooth Handset Hack and includes additional illustrations and step by step instructions to help you build one of your own.
If you are a Make: subscriber, you can read the article via your digital edition subscription. Non-subscribers should be able to click here for a sneak preview.
Make: is the one magazine I look forward to the most throughout the year. I am very excited to be a part of Make: and hope to contribute again in the future.
The single biggest challenge to doing “real” SMT work (0805 or smaller components and fine lead pitch ICs) at home is being able to actually see what you are doing. I know that there are many hobbyists (and maybe even some budget-conscious professionals) who will disagree with me, but I wouldn’t dream of working with surface mount components without using a microscope. I’ve tried many alternatives, including a 10X handheld triplet loupe, a magnifier ring light, even a nausea-inducing magnifying visor, and none of these even come close.
In case I haven’t made myself clear: I would rather solder SMT’s with a 150W soldering gun than with anything other than a decent stereo microscope.
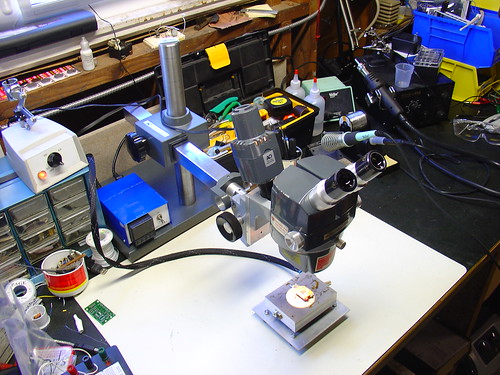
In January of this year, I scored a stereo zoom microscope on eBay. While my scope is far from state of the art (it’s a “vintage” American Optical model 569) the optics are fantastic and it quickly became the most prized piece of equipment in my shop. Here’s a photo of the scope shortly after I added it to my lab, for more photos and information about it, see my original post.
For the first few months, I used the scope pretty much as it arrived. One of the first major tasks I used it for was assembling the first batch of AVR HV Rescue Shields, and for this purpose it worked extremely well. However, as time went on, it became clear that I needed to improve my setup in a couple areas:
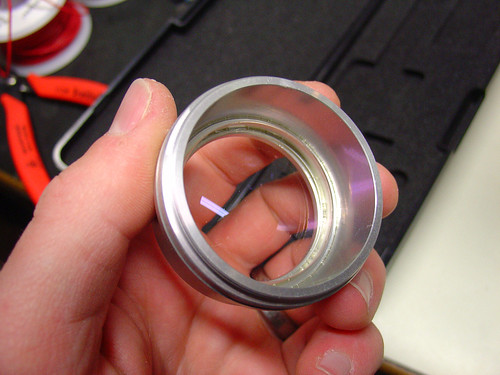
The first upgrade I made was to add a secondary objective aka barlow lens to the scope. A secondary objective serves to increase or decrease the total magnification of a microscope, while simultaneously trading off working distance, the distance between the bottom of the microscope and an object in focus on the bench. In my case, I added a 0.5x secondary objective, which gave me half the magnification while increasing my working distance by approximately 2x. While American Optical stopped making accessories for the StereoStar 569 long ago, Reichert, who acquired AO’s microscope line, still sells parts and accesories, including the #575 0.5X secondary objective, shown below.
The secondary objective screws into the existing threads on the bottom of the microscope. Here it is installed on my scope:
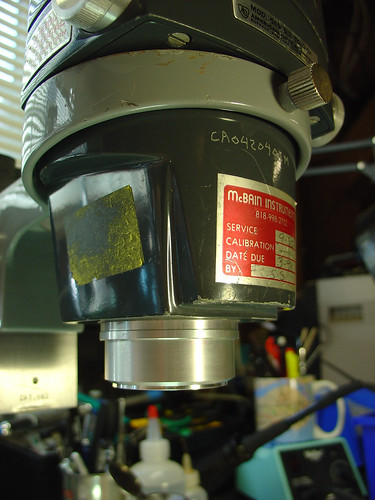
Now with the secondary objective installed, I have a zoom range of 3.5-15X and a working distance of 6-8″. If I need higher magnification, I can always remove the lens. Perfect!
The second upgrade I made was to add a fluorescent ring light to the scope. I picked up the cheapest one I could find on eBay. This model is sold by Amscope, outputs 8W, and is available for under $30:
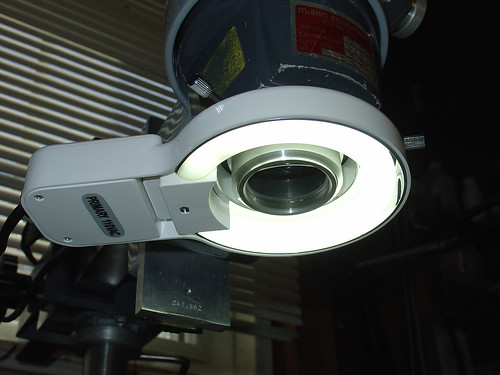
The ring light conveniently attaches to the newly installed secondary objective by tightening three thumbscrews, and provides a decent amount of light that fully illuminates both the object I’m working on as well as the surrounding workbench area, which has been surprisingly helpful. Best of all, the new light stays out of the way and provides more even illumination than the halogen projector that came with the scope.
Here’s a photo of the microscope setup as it looks today:
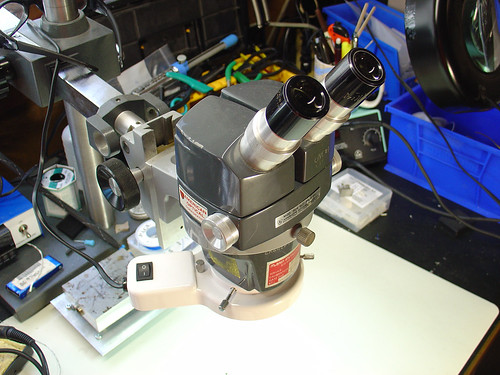
While the changes I made are significant improvements over my original setup, I have made a few observations that may lead to even more tweaks and upgrades in the future:
Despite these minor issues, I am pretty happy overall with the new setup even after a couple hundred hours of heavy use.